
Last Updated on November 25, 2025
I have received a lot of feedback from people saying they were unable to pass the qualification test, even though I personally feel that the test is pretty simple and straightforward. There are two common reasons I noticed why people fail their sample test:

Reason 1: Sound Quality Issues (Microphone Problems/ Noise Issues)
This is the #1 reason why people fail their tests. Almost 80% of the people that told me they failed their Usertesting qualification stated issues in audio as the reason for rejection. I believe it is a common issue as people are not accustomed to using the microphone on their laptops, and they don’t know if it even works properly.
To troubleshoot this problem, we first need to do a soundcheck. Open the Voice Recorder app on your laptop.
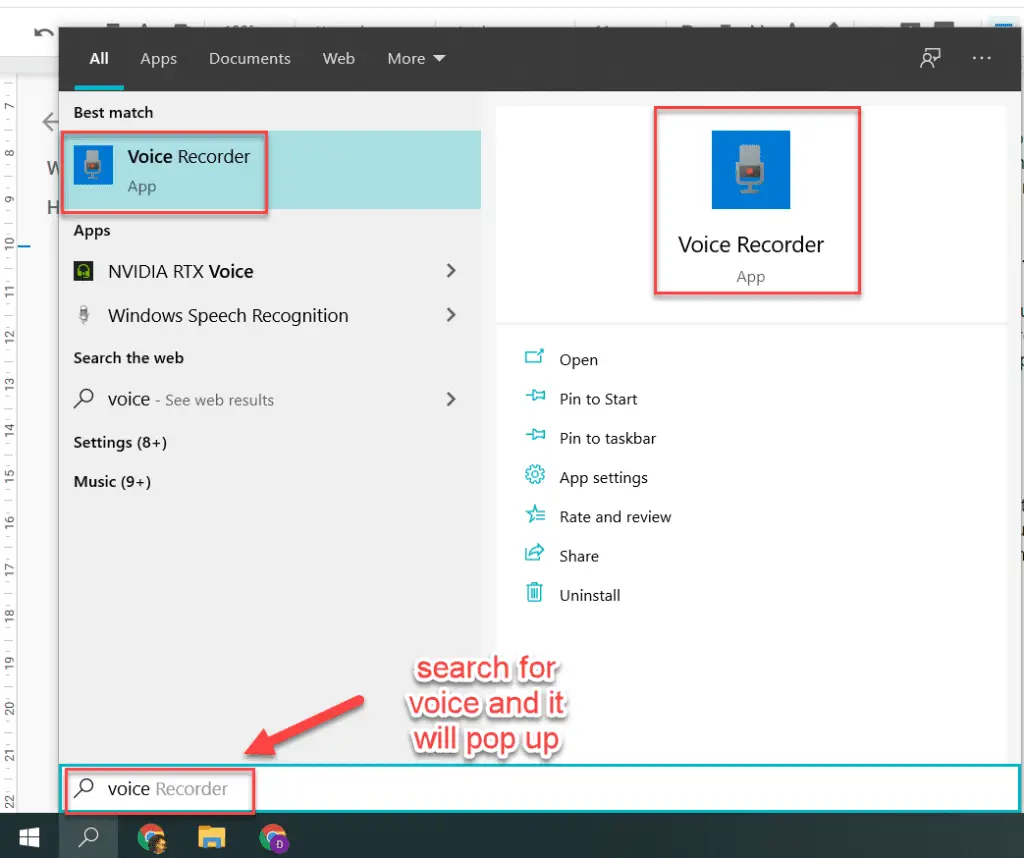
Once you have opened the app, record yourself saying something.
- Try recording your voice for 5 seconds, and play it back.
- Record some more, bring variation by speaking at different distances from your laptop.
- Also, try to speak at different levels of loudness.
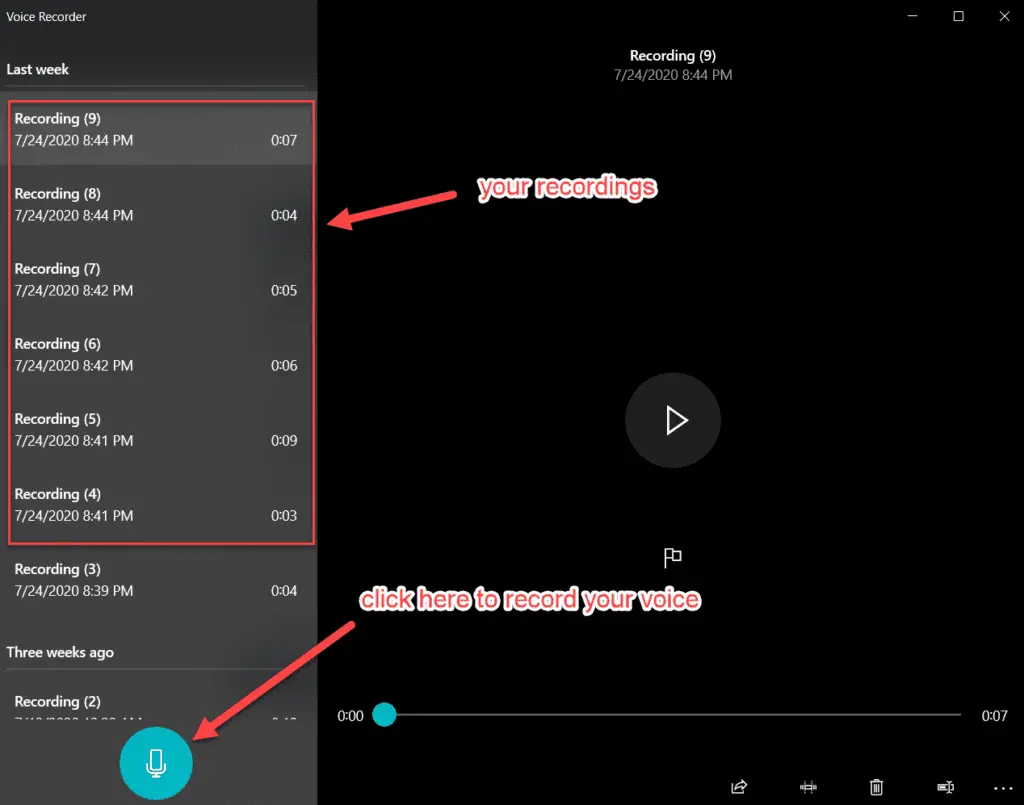
Now playback the recordings. You might cringe a little listening to your own voice (it happens to everyone), but it will give you an idea of how the microphone is picking up your voice. For example, you can better understand where you need to speak from for the best possible input. This is because laptops have different placement of the in-built microphones.
In case you are unable to hear yourself in any of the recordings, there is some serious problem with your mic. It could be due to two reasons: Either your mic is broken, or you have some problem with your microphone settings.
Fix 1: Check your Microphone Settings and Drivers
Fix: If it’s the wrong settings that are causing this issue, you can check out this article (specific to Windows 10) or just search google for “Microphone troubleshooting <your device/manufacturer name>”
If your microphone is broken, I suggest you get an external microphone online. There are 2 types of microphones you can buy online: Digital Mics and Condenser Mics. Digital mics are the cheaper option and get the job done, but if you want to take your voice recording to the next level, get yourself a condenser mic. I will discuss more about them later.
Another thing to note in your recordings is whether the voice is loud and clear. Sometimes, the voice cuts off in-between very abruptly, which might be caused due to several factors. But if it is happening, do try to note whether changing your speaking position fixes it (sometimes the voice is cut abruptly as part of the noise cancellation mechanism).
Fix 2: Get a New Microphone, or use your Smartphone as a Mic
Fix: It is more difficult to fix, as there are a different number of reasons that can cause this. It might be an issue with your software drivers, or it could even be your hardware.
The best bet here is to check Google for answers specific to your device. You can also try the mobile app I mentioned earlier to use as an external mic, and see if the problem still persists. If the issue is solved, you can use your smartphone instead of your laptop’s in-built mic.
Fix 3: Use AI based Noise Reduction Tool
The last issue that we are looking for is background noise. It is caused by the appliances in your environment, such as refrigerator, fans, A/C. Check if the mic is picking up a lot of background noise. If your voice can over-power the background buzzing/humming sound, then it is OK. But sometimes there is a static sound due to these devices, which interferes with your voice and degrades the quality of your recording.
If you face this issue, try moving to a quieter environment, or switch off the fan or other devices for the duration of the recording.
Increasing your voice quality helps you converse with clarity. Try Krisp, an AI-based noise reduction tool that will get you studio-quality voice recording from your regular microphones. It’s free!
You need to understand that your voice is the main medium of communication in these tests, and you are being paid for your thoughts and opinion. Without a clear and loud voice recording, the reviewer on the other end would not be able to judge your work. So make sure you get the basics clear.
Reason 2: You are Not Speaking Enough
If you fail due to this reason, then it is more of a problem with your understanding of the tasks rather than a technical glitch.
The sample test consists of tasks. But just finishing the tasks successfully does not qualify you as a tester. The actual test is about how you verbally dictate your thought process while doing the required tasks.
The main aim of the tests that you take in Usertesting is to understand the psyche of the end-user while he/she performs the said tasks. This helps the UX designers get detailed insights on how they can improve the design of the website/app in a way to make it simpler to the user.
You can watch the video below to get an idea as to what exactly you are required to do:
Say the task requires you to find the opening time of a particular museum. This does not mean you just navigate to the required information and it is finished. You actually need to speak out your thoughts as often as possible, such as “I think the museum’s information page might contain the timing information”, “Maybe the sidebar contains a link that can tell us about the opening time of the museum”.
Not only this, they are looking for as much feedback as you can give regarding your experience with using the site/app, so don’t shy away from speaking anything, such as:
“Maybe if that button was a different color, such as green, it would be much more appealing to me.”
“I think if that link was a little more highlighted, it might be easier to navigate to it.”
“The animations on the site make it really enjoyable to interact with”
“I would like it if the text here was more concise and simpler”
And so on. You get the idea.
Remember, the more you communicate and speak out your thoughts, the more you help the researchers. Speak out even if you think it is silly or irrelevant. Your unique insights can help the researchers in various ways.
It’s not the tasks that you need to complete, it’s speaking what’s on your mind while doing them that’s the actual task. Your thoughts are what will help the User Experience designers gain valuable insights on their products, and understand how users will interact with them. Remember there is no right or wrong way to do anything, there is no correct or incorrect answer. It’s just about your genuine opinion.
And this is exactly what makes Usertesting (and other similar sites) so interesting. You are getting paid for your opinion, and nothing else.
Hope the above two tips help you in clearing the Usertesting Sample Test on the very first attempt. You get another chance if you mess it up the first time.

Qualifying for your first paid test
So you have cleared the sample test, and have become a tester. Now, you will start getting test invites on your dashboard. Most of the time, you will be greeted with the following screen on the dashboard:
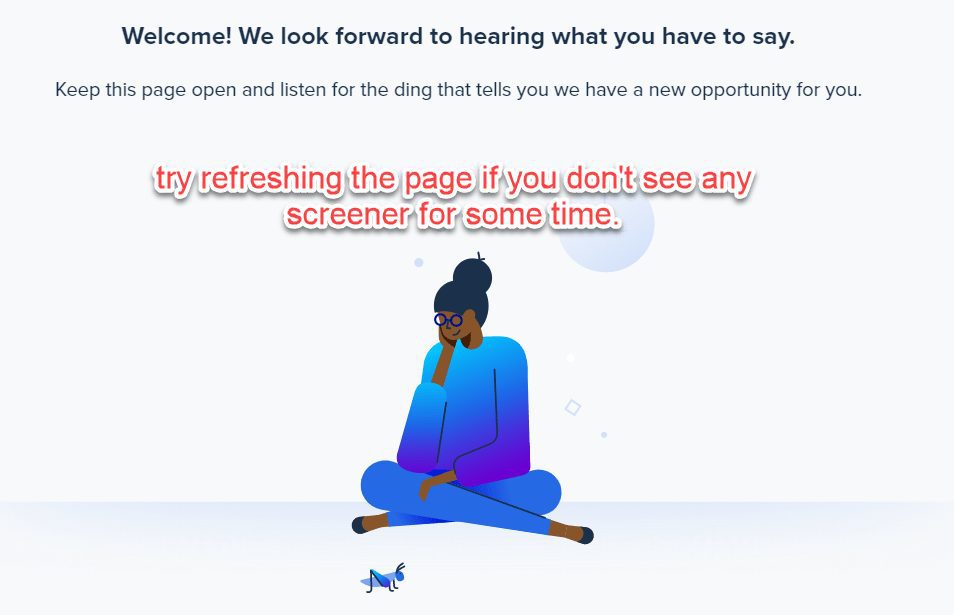
You hear a “ding” sound whenever there is a screener available for you. However, sometimes the tab might get suspended due to memory problems. So if it has been quite some time (or maybe your PC was put to sleep), you should refresh the page to make sure it becomes active again.
Have the tab open and keep checking if any screeners are available (you miss the “ding” sometimes). Attempt every screener available to you, and don’t lose hope if you get disqualified. On an average, you will be disqualified from 90% of the screeners you give. So try to keep attempting more and more testing screeners as they come. It’s a numbers game.
Note: If you don’t seem to be getting a lot of screeners, have a look at your profile. Fill it up properly with all details such as the type of devices you own, your occupation, income, etc. This information will help you get more screeners to qualify for. For example, if you add an Android phone, you will get test invites that require an Android smartphone. Install the Usertesting app on your device to attempt those screeners.
Eventually, you will qualify for your first test.
Your first paid test is going to be very important, as it will be personally reviewed by the Usertesting team. They will assign you a rating based on this test. This rating is very important because the better your rating, the more screeners are available to you in the future.
So, for your first screener, try to give it your best shot.
-
Usertesting can help you earn quick 10$ by completing simple 10-30 minute tests. There are a lot of tests available daily, but qualifying for them is what limits your earning potential.
-
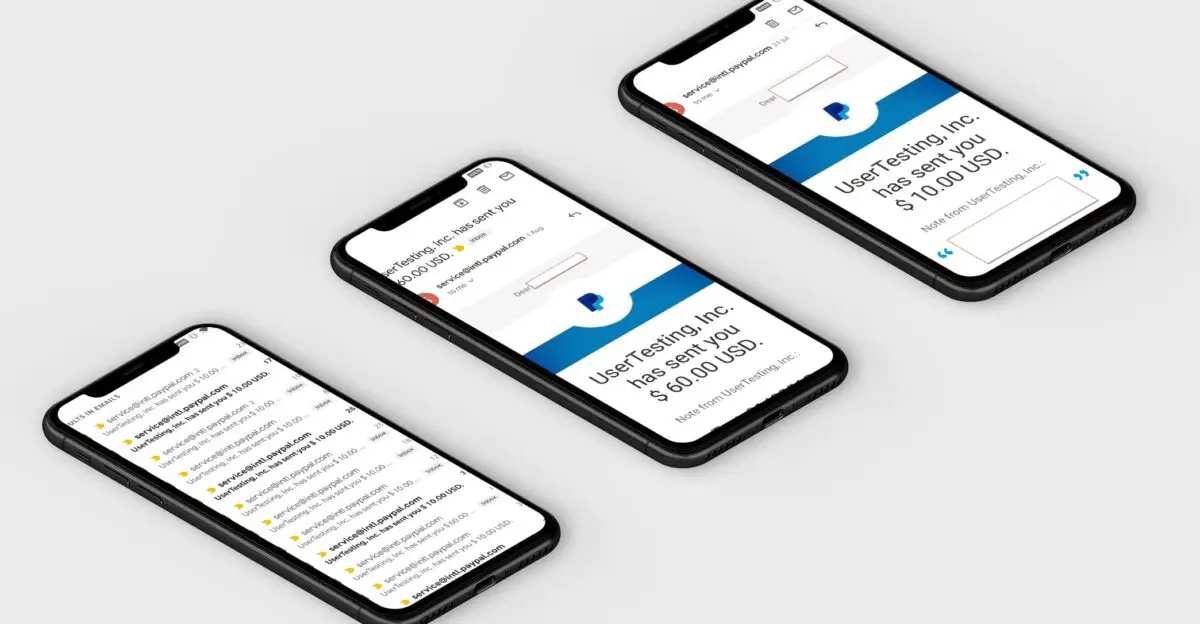
All Payment Proofs from Usertesting go here.
-
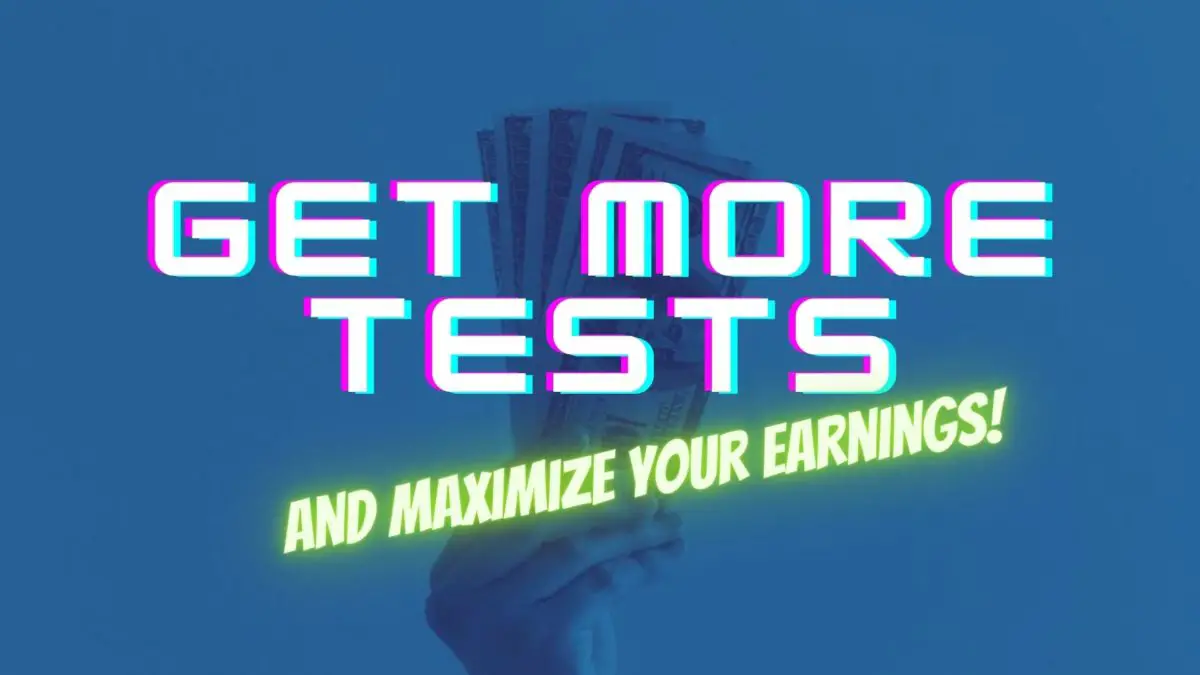
Maximize your Usertesting earnings by attempting as many screeners as possible. How to get more screeners? Read to find out.


its is about 7 days still my practice test is in review what to do?
Try contacting their support using the chatbot on the site.